Observability Stack

Observability is tooling or a solution that allows us to debug the system actively. Observability is based on exploring properties and patterns not defined in advance. Observability is important because it gives us visibility into what’s happening inside the system. The 3 pillars of observability are logs, metrics and traces.

A Dockerized Grafana/Prometheus/Victoriametrics/Loki/Jaeger environment

  • Ensure docker and docker-compose is installed and running (see https://docs.docker.com/get-docker/)
  • Run docker-compose up
  • Once instances are up you can connect to http://localhost:3000 (or http://<ip of server>:3000)
  • The default credentials are admin/passw0rd

Grafana is a multi-platform open-source analytics and interactive visualization web application. It allows query, visualize, alert on and understanding of the metrics.

Prometheus is an open-source monitoring solution for collecting and aggregating metrics as time series data.

VictoriaMetrics is an Open Source Time Series Database (see https://github.com/VictoriaMetrics/VictoriaMetrics).

VictoriaMetrics and Prometheus write data to disk at roughly 2MB/s speed when collecting 280K samples per second. Prometheus generates more disk write spikes with much higher values reaching 50MB/s, while the maximum disk writes spike for VictoriaMetrics is 15MB/s. VictoriaMetrics needs up to 5x less RAM and 7x less disk space compared to Prometheus when scraping thousands of node_exporter targets. So you can use one of them.

Loki is a horizontally-scalable, highly-available, multi-tenant log aggregation system. It is designed to be very cost-effective and easy to operate. It does not index the contents of the logs, but rather a set of labels for each log stream. (see https://github.com/grafana/loki).

Promtail is the agent, responsible for gathering logs and sending them to Loki.

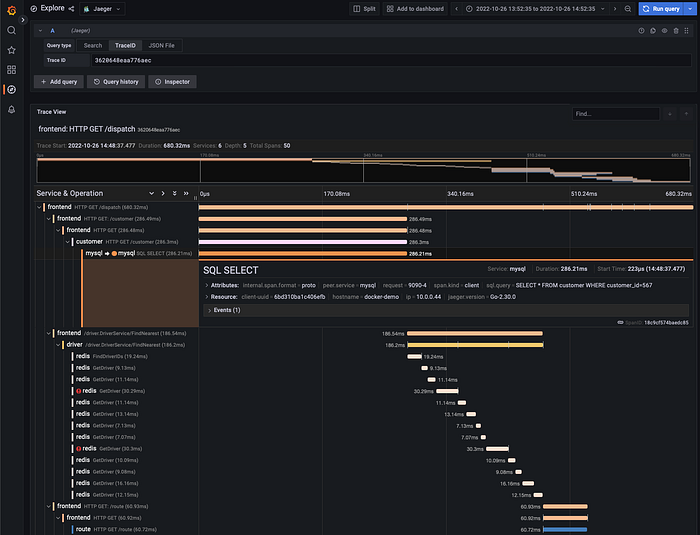
Jaeger is an open-source distributed tracing tool meant to monitor and troubleshoot transactions in distributed systems. (see https://github.com/jaegertracing/jaeger).

Telegraf is the agent for collecting and sending all metrics and events from various systems. (see https://github.com/influxdata/telegraf).

You can use telegraf input plugins from here, https://github.com/influxdata/telegraf/tree/master/plugins/inputs

Download: https://github.com/mhoshim/observability

Screenshots

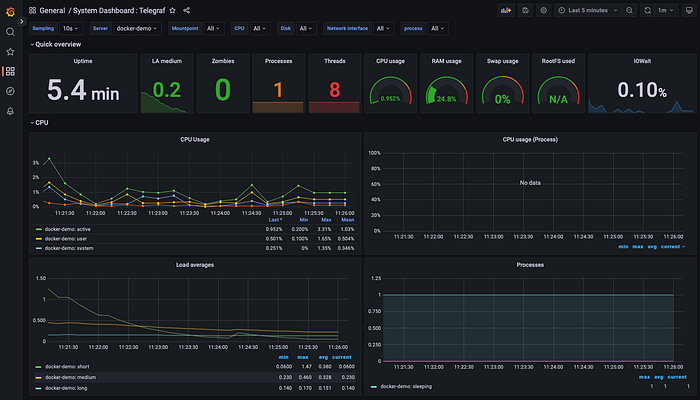
System Metrics
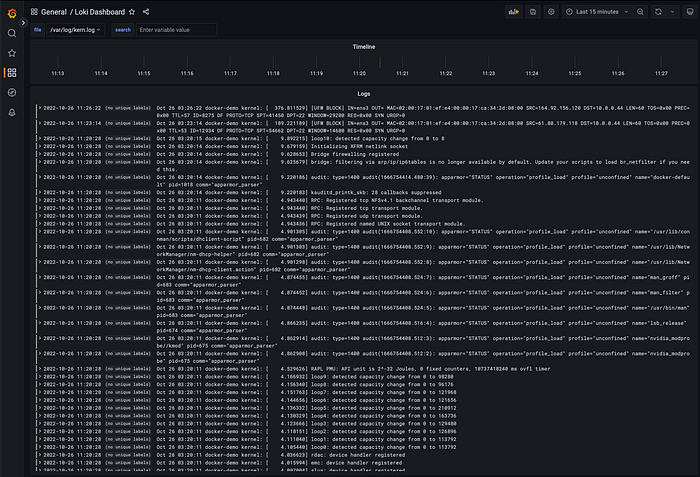
Kernel Logs

MySQL: Enable Secured Connections

MySQL is an open-source relational database system that works on many Operating Systems including Windows, Linux, and MacOS. By default, MySQL is configured to only accept local connections. If you need to allow remote connections, it is important to do so securely. Use the following instruction to configure MySQL to accept remote connections with SSL/TLS encryption.

Before you start, you can check the current SSL/TLS status.

#mysql -u root -p -h 127.0.0.1

mysql> SHOW VARIABLES LIKE '%ssl%';

Output

+---------------+----------+
| Variable_name | Value    |
+---------------+----------+
| have_openssl  | DISABLED |
| have_ssl      | DISABLED |
| ssl_ca        |          |
| ssl_capath    |          |
| ssl_cert      |          |
| ssl_cipher    |          |
| ssl_crl       |          |
| ssl_crlpath   |          |
| ssl_key       |          |
+---------------+----------+

Check the status of our current connection to confirm:

mysql> \s

Output

--------------
Connection id:      30
Current database:   
Current user:       root@localhost
SSL:         Not in use
Current pager:      stdout
Using outfile:      ''
Using delimiter:    ;
Server version:     5.7.17-0ubuntu0.16.04.1 (Ubuntu)
Protocol version:   10
Connection:      127.0.0.1 via TCP/IP
Server characterset:    latin1
Db     characterset:    latin1
Client characterset:    utf8
Conn.  characterset:    utf8
TCP port:       3306
Uptime:         1 hours 11 min 54 sec
--------------

The above output indicates SSL is not currently in use.

Generate SSL/TLS Certificates and Keys

To enable SSL connections to MySQL, at first need to generate the certificate and key files. We can use a utility called mysql_ssl_rsa_setup to simplify this process. The files will be created in MySQL’s data directory, located at /var/lib/mysql. We need the MySQL process to be able to read the generated files, so we will pass mysql as the user that should own the generated files.

#mysql_ssl_rsa_setup --uid=mysql

The generation will produce output that looks something like this:

Output

Generating a 2048 bit RSA private key
...................................+++
.....+++
writing new private key to 'ca-key.pem'
-----
Generating a 2048 bit RSA private key
......+++
.................................+++
writing new private key to 'server-key.pem'
-----
Generating a 2048 bit RSA private key
......................................................+++
.................................................................................+++
writing new private key to 'client-key.pem'
-----
SHOW VARIABLES LIKE '%ssl%';

Verify the generated files by typing:

#find /var/lib/mysql -name '*.pem' -ls

These files are the key and certificate pairs for the certificate authority (starting with “ca”), the MySQL server process (starting with “server”), and for MySQL clients (starting with “client”). Additionally, the private_key.pem and public_key.pem files are used by MySQL to securely transfer password when not using SSL.

Enable SSL Connections on the MySQL Server

We don’t actually need to modify the MySQL configuration to enable SSL, restart the MySQL service instead.

#systemctl restart mysql

After restarting, connect to MySQL using the same command as before. The MySQL client will automatically attempt to connect using SSL if it is supported by the server.

Check the values of the SSL related variables:

mysql> SHOW VARIABLES LIKE '%ssl%';

Output

+---------------+-----------------+
| Variable_name | Value           |
+---------------+-----------------+
| have_openssl  | YES             |
| have_ssl      | YES             |
| ssl_ca        | ca.pem          |
| ssl_capath    |                 |
| ssl_cert      | server-cert.pem |
| ssl_cipher    |                 |
| ssl_crl       |                 |
| ssl_crlpath   |                 |
| ssl_key       | server-key.pem  |
+---------------+-----------------+

The have_openssl and have_ssl variables read “YES” instead of “DISABLED” this time. Furthermore, the ssl_ca, ssl_cert, and ssl_key variables have been populated with the names of the relevant certificates that we generated.

Configure Remote Access with Mandatory SSL

Currently, the MySQL server is configured to accept SSL connections from clients. However, it will still allow unencrypted connections if requested by the client.

Let’s turn on the require_secure_transport option for all connections to be made with SSL.

#nano /etc/mysql/my.cnf

Under [mysqld] section header, set require_secure_transport to ON:

[mysqld]
# Require clients to connect either using SSL
require_secure_transport = ON

To allow MySQL to accept connections on any of its interfaces, we can set bind-address to “0.0.0.0”.

[mysqld]
# Require clients to connect either using SSL
require_secure_transport = ON
bind-address = 0.0.0.0

Next, restart MySQL to apply the new settings.

Configure a Remote MySQL User

Log into MySQL as the root user to get started.

Inside, you can create a new remote user using the CREATE USER command. We will use our client machine’s IP address in the host portion of the user specification to restrict connections to that machine.

mysql> CREATE USER 'remote_user'@'mysql_client_IP' IDENTIFIED BY 'password' REQUIRE SSL;

Next, grant the new user permissions on the databases or tables they should have access to.

mysql> CREATE DATABASE example;
mysql> GRANT ALL ON example.* TO 'remote_user'@'mysql_client_IP';

Next, flush the privileges to apply those settings immediately.

mysql> FLUSH PRIVILEGES;

We can exit from shell now.

mysql> exit
MariaDB Galera: Recover Cluster after full crash

  • Selecting the right node: Look at the grastate.dat file on each server to see which machine has the most current data. The node with the biggest seqno is the node with the current data

    /var/lib/mysql/grastate.dat

  • In the same server execute the following command to bootstrap

    mysqld –wsrep-new-cluster

  • Next login to node 2 and start MySQL
  • Once its success, start MySQL on node 3
  • Once the cluster is stable, stop the bootstrap process in node1 and start it using systemctl.

MySQL: Terminate idle connections

Manual cleanup:

  • Login to MySQL

    mysql -uroot -p

  • Run the following query

    select concat(‘KILL ‘,id,’;’) from information_schema.processlist where Command=’Sleep’;

  • Copy the query result, paste and remove a pipe ‘ | ‘ sign, copy, and paste all again into the query console
  • Hit ENTER

Automatic cleanup:

  • Configure mysql-server by setting a shorter timeout on wait_timeout and interactive_timeout
  • Check your existing configuration using the following command

    show variables like “%timeout%”;

  • Set with:

    set global wait_timeout=3; set global interactive_timeout=3;

Redis: Increase maxclients limit

Edit systemd service file

$sudo nano /etc/systemd/system/redis.service

Add or update the LimitNOFILE

[Service]

User=redis
Group=redis
LimitNOFILE=65536

Once done then you must daemon reload and restart the service

$sudo systemctl daemon-reload
$sudo systemctl restart redis.service

To check if it works, try to cat proc limits

$sudo cat /run/redis/redis-server.pid
$sudo cat /proc/PID/limits

Netdata: Debug

Enable the debug mode as below to trace the error for netdata plugins

#/usr/libexec/netdata/plugins.d/python.d.plugin 1 debug module_name
#/usr/libexec/netdata/plugins.d/python.d.plugin dns_query_time debug trace 1
#/usr/libexec/netdata/plugins.d/node.d.plugin 1 debug snmp

Logstash: MySQL – Slow Log Grok

^# User@Host: %{USER:user}\[%{USER:current_user}\]%{SPACE}@%{SPACE}\[%{IP:ip}\](.|\r|\n)*#%{SPACE}Thread_id:%{SPACE}%{NUMBER:thread_id:int}%{SPACE}Schema:%{SPACE}%{USER:schema}%{SPACE}QC_hit:%{SPACE}%{USER:qc_hit}(.|\r|\n)*# Query_time: %{NUMBER:query_time:float}%{SPACE}Lock_time:%{SPACE}%{NUMBER:lock_time}%{SPACE}Rows_sent:%{SPACE}%{NUMBER:rows_sent:int}%{SPACE}Rows_examined:%{SPACE}%{NUMBER:rows_examined:int}(.|\r|\n)*# Rows_affected:%{SPACE}%{NUMBER:rows_affected:int}(.|\r|\n)*SET%{SPACE}timestamp=%{NUMBER:timestamp};%{GREEDYDATA}